

How to Apply Gel Polish Without Streaks or Bald Spots
Last Updated: November 1, 2026
Quick Summary
Prevent gel polish streaks by loading a thin film of polish instead of a bead, applying each coat in three strokes (middle, left, right), and never brushing back over wet gel. Prep the nail by buffing, wiping with prep and letting it dry fully, then cure each thin layer completely before adding the next.
- A flooded brush is the number one cause of streaks, so load a thin film, not a bead.
- Start the brush 1-2 mm above the cuticle and push gently toward it to shape the edge.
- Dense shades like white need two or three thin coats rather than one heavy layer.
- Let cold gel come to room temperature before use, since cold gel is thicker and levels poorly.
- Never thin gel polish with solvent or remover; it will not cure properly and can irritate skin.
Table of Contents
- Why Gel Polish Looks Streaky: The Six Real Causes
- How to Apply Gel Polish Without Streaks: A Step-by-Step Routine
- Gel Polish Brush Technique: Loading, Wiping and Stroke Control
- How to Apply White Gel Polish Evenly (and Other Dense Shades)
- Fixing Streaks Before and After Curing
- Lamp, Curing and Storage Problems That Cause Streaks
- Stocking the Brushes and Polishes That Prevent Streaks
- Frequently Asked Questions
Why Gel Polish Looks Streaky: The Six Real Causes
Gel polish streaks are lines, patches and uneven color left in a cured gel layer.
The fix is rarely a new lamp. It is almost always the brush hand.
Below, we break down the six causes we see most often, then walk through the routine that prevents them. The causes are worth knowing because each one needs a different fix.
Cause 1: Too Much Polish on the Brush
A flooded brush is the number one cause of streaks. Excess gel pools at the cuticle and sidewalls, then cures unevenly.
Watch out: a thick bead of polish at the cuticle can shrink back during curing and leave a visible gap along the edge.
Cause 2: Brushing Over Wet Polish
Repeated passes over wet gel drag the surface and leave ridges. Once gel starts to set, brushing it again lifts the skin that has already begun to cure.
Apply, then leave it alone. That single habit removes most streaking.
Cause 3: Skipping or Rushing Surface Prep
Gel needs a clean, dry surface to grab. Oily nails can push color around and cause patchy coverage.
- Buff the nail plate lightly to remove shine
- Wipe with prep and let it dry fully
- Keep fingers off the nail after prep
The other three causes (product consistency, brush condition, and curing problems) come up later in this guide.
Each cause of streaking needs its own fix, so here are the main culprits at a glance.
| Cause | What happens | Fix |
|---|---|---|
| Too much polish on the brush | Excess gel pools at cuticle and sidewalls, cures unevenly | Load a thin film, not a bead |
| Brushing over wet polish | Repeated passes drag the surface and leave ridges | Apply once, then leave it alone |
| Skipping or rushing surface prep | Oily nails push color around, causing patchy coverage | Buff, wipe with prep, let dry fully |
How to Apply Gel Polish Without Streaks: A Step-by-Step Routine
Learning how to apply gel polish without streaks comes down to one idea: thin layers, few strokes, full cure between coats. That order matters more than any single product.
What You'll Need Before You Start
Gather everything first so you are not reaching mid-application:
- A round gel brush, kept clean and flat
- Base coat, color and top coat
- Prep and clean solution plus a lint-free wipe
Steps 1-3: Prep, Base Coat and the Thin First Pass
- Prep the nail. Push back cuticles, buff the plate, wipe with prep, and let it dry.
- Apply base coat thin. One even coat, then cure. A HEMA-monomer free base like EnVogue Base Coat is designed to create a smooth foundation for color.
- Float on the first color coat. Keep the brush barely touching the surface and use three strokes: middle, left, right.
Cure that first pass fully. A tacky first coat will drag under the second.
Steps 4-6: Building Coverage Without Re-Brushing
- Add a second thin coat. Load fresh polish and repeat the three-stroke pattern.
- Stop touching it. If a spot looks light, fix it with the next coat, not by re-brushing wet gel.
- Cure, then top coat. Seal with a thin top coat and cure per the product's instructions.
For a deeper walkthrough, see our guide on how to achieve full coverage gel polish.
Gel Polish Brush Technique: Loading, Wiping and Stroke Control
Good gel polish brush technique is three moves: load one side, wipe one side, stroke in one direction. Get those right and streaks mostly disappear. But when streaks persist, the cause is usually one specific part of the stroke, not the whole method. Use this section as a diagnostic: match your symptom to the fix.
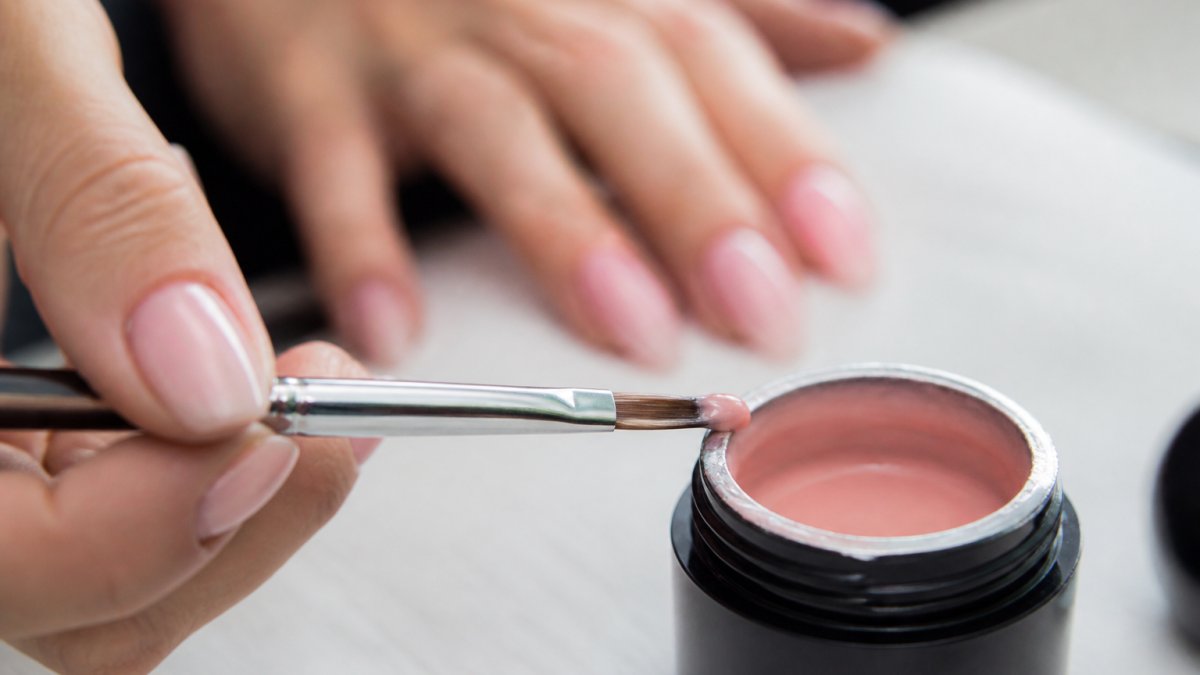
Load the brush correctly
Drag one side of the brush through the gel at a shallow angle, then wipe the other side against the pot rim. You want a thin film on one side, not a bead on both.
If you see gel pooling on the outside of the bristles after wiping, you have overloaded. Wipe again, but do not scrape the brush dry against the rim, a dry brush drags and leaves skip marks.
Diagnose by symptom
- Streaks that follow the brush direction: pressure is too heavy or the brush is too dry. Lighten your hand and reload with a thinner film.
- Streaks that cross the nail (perpendicular to your stroke): you are brushing over wet gel. Stop after one pass and let the coat level before curing.
- Bald patches near the cuticle: the brush started on the cuticle instead of just above it, pushing gel outward. Start 1-2 mm above the cuticle and push gently toward it to shape the edge.
Stroke control that prevents streaks
- Start just above the cuticle, never on it.
- Push the brush slightly toward the cuticle to shape the edge, then pull straight to the tip in one steady pass.
- Keep pressure light and even, the bristles should bend, not splay.
A round brush with firm, fine fibers makes this easier. The Sofgel Round Gel Brush is made for potted gels. Keep bristles free of dried gel so they stop dragging. If your brush has splayed or curled bristles, replace it, no technique fixes a brush that no longer holds a straight edge.

How to Apply White Gel Polish Evenly (and Other Dense Shades)
Dense shades need more coats, not thicker ones. How to apply white gel polish evenly is really a lesson in patience: three thin layers beat one heavy one every time.
White and other opaque colors hide nothing. Every ridge shows.
- Stir the pot gently; never shake it
- Use the thinnest coat you can still see
- Cure each layer before adding the next
Practice the technique on a dense shade and your sheer colors get easier too.
Fixing Streaks Before and After Curing
Streaks caught before curing are easy. Streaks caught after curing need a light touch.
Before curing, smooth a wet ridge by floating a thin layer over it with a nearly dry brush.
After curing, buff the ridge lightly, wipe clean, and add one thin color coat before sealing.
Watch out: sanding a cured gel too hard thins the layer and can cause lifting at the edges.
Lamp, Curing and Storage Problems That Cause Streaks
A weak lamp causes wrinkles and shrinkage that look like streaks. Curing problems are the cause people blame last and should check first. This section separates surface appearance from under-curing, then covers how product condition and storage affect leveling, a gap most guides skip.
Lamp and curing troubleshooting
Match your lamp to your gel system. If the brand specifies a wattage or wavelength, use it. Cure times on the label are not suggestions. A common pattern is a lamp that is too weak for the gel, which leaves the surface looking level but the layer underneath under-cured; that shows up later as lifting, wrinkling, or a streaky appearance that returns after top coat.
- Coat thickness vs. cure time: a thick coat may look cured on the surface while the center stays soft. Thin coats cure more evenly and level better.
- Lamp placement: place the hand flat and centered so all five fingers sit under the bulbs. Tilting the hand or curing fingers at the edge of the lamp leaves one side under-cured.
- Lamp compatibility: a lamp built for a different gel chemistry may not fully cure your product even at the stated time. If streaks persist across multiple colors, test a known-good gel in the same lamp to isolate the variable.
Product condition and storage
Gel thickens when it sits in heat or light, and thick gel drags. Keep pots capped, upright, and away from sunny windows. If a gel has gone stringy, replace it rather than thinning it, thinning changes the chemistry and can cause curing problems.
- Separated gel: some gels separate in the pot. Stir gently with a clean tool; do not shake, which introduces bubbles that cure as pits.
- Cold gel: cold gel is thicker and levels poorly. Let the pot come to room temperature before use, or warm it briefly in your hand, never microwave or heat it directly.
- Thickened gel: if the gel no longer flows off the brush in a thin film, it is past its working consistency. Replace it.
Safe recovery for cured streaky layers
If a streaky layer has already cured, do not file aggressively or peel it. Lightly buff the ridge with a fine buffer, wipe clean, and add one thin color coat before sealing. Aggressive filing thins the layer and can cause lifting at the edges; peeling damages the nail plate and makes the next application harder to level.
Stocking the Brushes and Polishes That Prevent Streaks
The right supplies remove half the battle. A smooth-apply formula and a clean round brush make even coverage easier to achieve.
At Hotlines Beauty, we carry professional-grade gels built for thin-layer application. Our Sofgel Polish line, including Atlas and Waterfalls, uses a buildable, smooth-apply formula with no HEMA and no TPO.


That matters for techs and hobbyists alike.
Keep a spare top coat on hand so a fix never waits on a reorder.
Frequently Asked Questions
Why does my gel polish go streaky even when I use thin coats?
Thin coats help, but they are only one part of the equation. Streaky gel polish usually comes from a brush that is too dry, from dragging the brush back over a half-cured pass, or from a base coat that was not fully dry before color went on. Check your brush load first: a round brush should carry enough polish to glide, not scrape. Then confirm each layer cures for the full 30 seconds before the next one, and keep coats to three maximum for full opacity.
Can you fix streaky gel polish before curing?
Sometimes. If the coat is still wet and you have not cured it, wipe the whole nail clean with a lint-free pad and start that finger again. Do not try to brush the streak out, because repeated passes over wet polish pull the pigment and make the streaks worse. If the coat is already cured, lightly buff the surface, wipe with prep and clean, then apply one more thin color coat rather than layering on top of an uneven surface.
How many thin coats of gel polish should you apply?
Two thin coats give most shades even coverage, and dense whites or pastels often need three. Apply each layer thin enough that it looks slightly see-through, then cure for 30 seconds before adding the next. Stop at three. More layers add bulk, raise the risk of lifting at the sidewalls and rarely improve opacity once the color is fully built. Seal with a top coat and cure to finish.
Why does white gel polish get streaky when other colors don't?
White carries more pigment and less binder than most colors, so it is thicker and dries on the brush faster. Load slightly more than usual, wipe only one side of the brush, and work in shorter strokes from the cuticle to the tip. Use a round brush, keep the polish at room temperature, and build opacity across thin layers instead of trying to cover the nail in one pass.
Streaky gel is a technique problem, not a talent problem. Thin coats, clean prep, a light brush hand and a full cure solve it in almost every case.
Hotlines Beauty carries the brushes, base coats and richly pigmented gels that make those habits easier to hold. Order through our catalog for free local delivery on qualifying orders, and keep your favorite shades, brushes and top coats stocked without the shipping wait.
